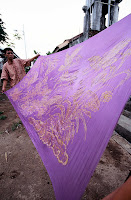
Creating Batik
 The two main techniques used for creating batiks are hand-painting (Batik Tulis) and printing. A variety of high quality cottons (e.g. Voile, Rayon, Volisima) and silks (e.g. Crepe du Sin, Chinese Silk, Hand-woven Indonesian Silk) are used.
Equipment:
-Canting Tulis (writing tool) -Paintbrush
-Canting Cap (wood or copper printing block) -Bunsen Burner
-Wax (mix of paraffin and sticky wax) -Small Wok
-Natural and Chemical Dyes
Batik Tulis
- Prepare a white section of cloth using the textile and dimensions of your choice.
- Use a pencil to draw your motif on the cloth.
- Gently melt a block of wax in the wok.
- Place a small amount of wax inside the canting.
- Blow the tip of the canting to ensure smooth delivery of the wax.
- The three main techniques for applying the wax are as follows:
- Klowong: Wax is applied to the lines of your design
- Ngerensi: Wax is applied to the body of the design.
- Di Blok: The background is covered with wax, leaving the pattern untouched. (However, if you want some parts of the pattern to be lighter, these areas must be blocked)
- Apply the dye. You can then repeat steps 5 and 6 in certain areas to achieve contrast between lighter and darker colors.
- Boil the material so that the wax turns to steam, revealing the white cloth beneath
- Now block the reverse portion of the patter to get your background/foreground color. Apply your dye.
- While the dye is still wet, apply hydrogen chloride (HCL), nitrate, and water. This will prevent the colors from fading.
- Boil again, then hang to dry in the sun. Iron when dry.


No comments:
Post a Comment